
Disclosure: As an Amazon Associate, Veranoz earns from qualifying purchases. We may earn a commission if you buy through links in this post, at no extra cost to you.
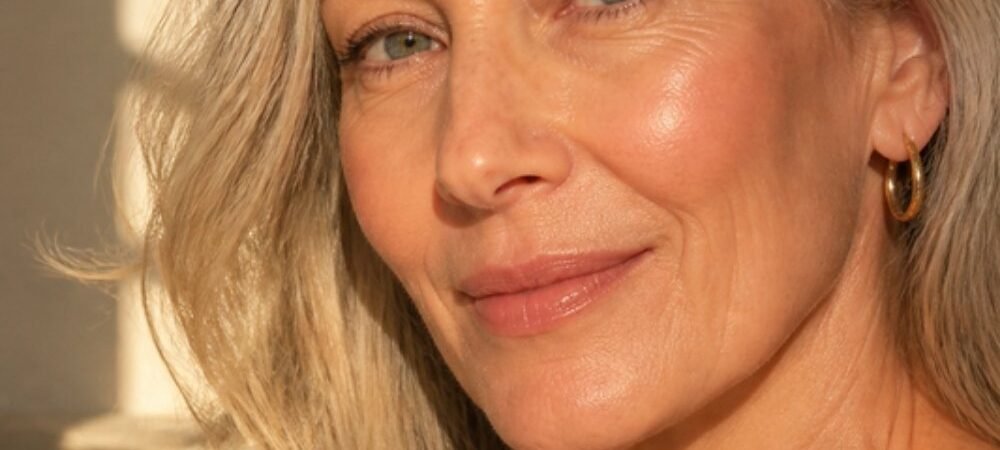
Glowing skin makeup is about hydration and placement, not shimmer: prep with a moisturizer and sunscreen, add a thin luminous primer or skin tint, conceal only where needed, use cream blush and a satin highlighter on the high points of the face, and keep the center of the face soft-matte so the look reads dewy, not greasy. Done this way, glow makeup makes skin look rested and healthy instead of shiny or textured.
Free: the Natural Makeup Cheat Sheet
Where to place blush and highlighter, a hooded-eye guide, a 5-minute everyday face and a makeup bag expiry chart, on 10 printable pages.
Free. You will also get a few short emails with tips and offers. Unsubscribe anytime. Privacy policy.
Below is a step-by-step glowing skin makeup routine, which product types to choose for dry, normal, oily and sensitive skin, exactly where to put highlighter if you have texture, fine lines or large pores, and how to keep the glow from turning into midday shine.
The Real Problem
Most “glow skin makeup” tutorials are filmed on poreless, filtered skin under ring lights. Copy them on real skin with texture and you get glitter sitting in every pore, highlighter that magnifies lines, a greasy forehead by lunch, and foundation sliding off the nose. Skin with fine lines or texture does look better with some light reflection, because a flat matte face can look tired. The trick is choosing where the light goes: on the high, smooth planes of the face and never on texture, with a hydrated base that glows from underneath.

Short Answer: Dewy, Not Greasy
Glow comes from: hydrated skin, a luminous (not shimmery) primer or skin tint, cream blush and a satin cream highlighter. Where the glow goes: tops of the cheekbones, brow bone tail, center of the nose bridge (if smooth), cupid’s bow and the center of the eyelid. Where it doesn’t: under the eyes, on enlarged pores, smile lines, the sides of the nose and textured cheeks. Keep it fresh: powder only the T-zone and sides of the nose, mist to finish, blot instead of re-powdering.
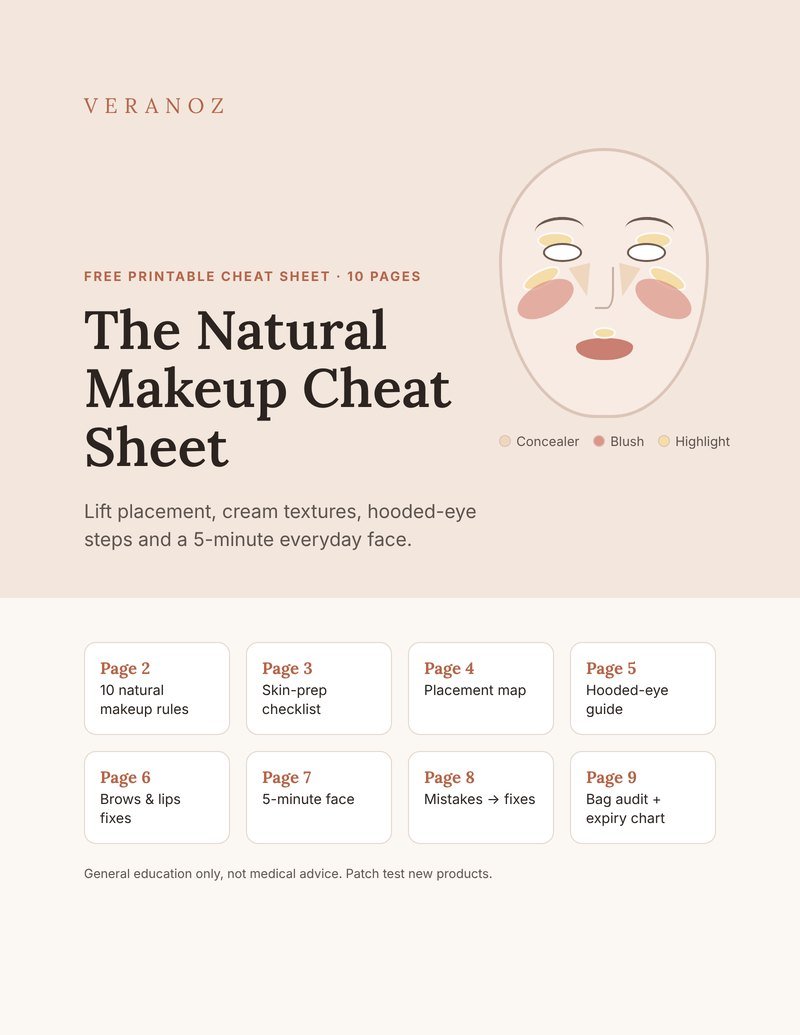
The Natural Makeup Cheat Sheet
10 natural makeup rules, a lift placement map for concealer, blush and highlighter, a 3-step hooded-eye guide, a 5-minute everyday face and a makeup bag audit.
Send me the free cheat sheet →In This Guide
Why Glowing Makeup Flatters Dry Skin
Skin naturally changes over time. It can produce less oil and become drier, especially in winter, and dry skin scatters light unevenly, which can make the face look dull or tired. Heavy matte makeup on top adds to that flat look. A light-reflecting finish does the opposite: it bounces light off the high points of your face, softens the look of shadows and gives the impression of hydrated, healthy skin.
The goal isn’t to look shiny. It’s to look like your skin after a good night’s sleep and a glass of water. That means:
- Glow from the base, not just the highlighter. Hydrated skin plus a luminous base looks natural.
- Satin, not glitter. Fine, satin reflection blurs; chunky shimmer magnifies texture.
- Strategic matte. A soft-matte T-zone keeps the glow looking intentional.
Skincare does a lot of the heavy lifting. Our guides on how to get glowing skin naturally and the best habits for glowing skin cover the long-term side.
Step 1: Skin Prep for Glowing Makeup
Glowing makeup starts before makeup. Skip prep and even the best highlighter sits on dry patches.
- Cleanse gently. Use a non-stripping cleanser and lukewarm water.
- Exfoliate a day or two before, not the morning of. Smooth skin reflects light more evenly. Use a gentle chemical exfoliant once or twice a week in the evening. The AAD notes that over-exfoliating leaves skin red and irritated, and that exfoliating while using retinoids can worsen dryness. Skip retinoids if you’re pregnant, trying to conceive or breastfeeding.
- Hydrating serum on damp skin. Humectants such as hyaluronic acid or glycerin draw water into the top layer of skin. See our best serum for glowing skin.
- Moisturizer. The AAD recommends applying moisturizer while skin is still damp. Dry skin can use a richer cream; oily skin a light gel-cream.
- Sunscreen. Broad-spectrum SPF 30 or higher. A Cleveland Clinic dermatologist notes that the SPF in makeup usually isn’t enough on its own and recommends letting sunscreen absorb for a few minutes before makeup.
Wait three to five minutes after sunscreen before your base. Most “my foundation pills” and “my makeup slides off” problems come from layering too fast over wet skincare.
Step-by-Step Glowing Skin Makeup Routine
Step 2: Luminous Primer (Where You Want Glow)
Apply a light-reflecting or “glow” primer only to the outer cheeks, cheekbones and temples. If you have enlarged pores on the nose or inner cheeks, use a smoothing, non-shimmer primer there instead. This split approach is the foundation of dewy-not-greasy makeup.
Step 3: A Thin, Hydrating Base
Choose a skin tint, serum foundation or natural-finish foundation with a satin or radiant finish. Use a small amount, start in the center of the face and blend outward with a damp sponge or your fingers, pressing rather than rubbing. Leave the outer face lightly covered so real skin shows through. For an even softer glow, mix one drop of liquid highlighter into your foundation on the back of your hand, but only if your skin is fairly smooth.
Step 4: Targeted Concealer
Use a creamy, hydrating concealer in small dots on redness, dark spots and the inner corner of the eyes. Dry or crepey under-eye skin often looks better with a peach corrector and a thin layer of concealer than with a heavy, bright one. Tap in with your ring finger. If you have sun spots to cover, see our guide to getting even skin tone.
Step 5: Cream Bronzer for Warmth
A matte or softly satin cream bronzer, one or two shades deeper than your skin, warms the perimeter of the face. Sweep it lightly on the temples, under the cheekbones and along the jaw. Warmth makes the glow look healthy rather than pale and shiny.
Step 6: Cream or Liquid Blush
Cream and liquid blushes melt into skin and keep the glow going. Smile slightly, dab blush on the top of the cheekbone, and blend up toward the temple. A dewy blush on top of a luminous base reads as a natural flush.
Step 7: Satin Highlighter on the High Points
Press a satin cream or liquid highlighter onto the very top of the cheekbones, just where the light naturally hits, using a fingertip. See the highlighter map below for exactly where to place it if you have texture.
Step 8: Soft Eyes
Prime lids, then use a satin or softly shimmering neutral on the center of the lid and a matte shade in the crease. Curl lashes and add a lengthening mascara. A dab of highlighter on the inner corner (not under the eye) wakes up the face.
Step 9: Glossy or Balmy Lips
Line lips with a liner close to your natural color, then use a tinted balm, sheer lipstick or a little gloss in the center of the bottom lip. Glossy lips echo the glow on the cheeks.
Step 10: Set Only the Center
Use a finely milled translucent powder and a small brush only on the sides of the nose, between the brows, the chin and the very center of the forehead. Leave the cheekbones and outer face unpowdered. Finish with a hydrating setting spray, holding it at arm’s length.
| Step | Product type | Finish | Where |
|---|---|---|---|
| 1 | Serum, moisturizer, SPF 30+ | Hydrated | Whole face and neck |
| 2 | Glow primer / smoothing primer | Luminous / blurring | Cheekbones / pores |
| 3 | Skin tint or serum foundation | Satin or radiant | Center of face, thin at edges |
| 4 | Creamy concealer, peach corrector | Natural | Inner eye, redness, spots |
| 5 | Cream bronzer | Matte or soft satin | Temples, under cheekbones |
| 6 | Cream or liquid blush | Dewy | Top of cheekbones |
| 7 | Cream or liquid highlighter | Satin | High points only |
| 8 | Eye primer, satin and matte shadow, mascara | Mixed | Lids and lashes |
| 9 | Lip liner, tinted balm or gloss | Glossy | Lips |
| 10 | Translucent powder, hydrating mist | Soft-matte center | T-zone and sides of nose |
Glowing Makeup Product Types by Skin Type
The same glow look needs different textures depending on your skin. Use this table as your shopping guide.
| Skin type | Primer | Base | Cheeks and glow | Setting |
|---|---|---|---|---|
| Dry or very dry | Hydrating or glow primer all over | Serum foundation, skin tint or tinted moisturizer | Cream blush, cream or balm highlighter | Hydrating mist; little or no powder |
| Normal | Glow primer on cheekbones | Radiant or satin foundation | Cream or liquid blush, liquid highlighter | Light powder on T-zone, mist |
| Combination | Glow primer outer face, mattifying primer T-zone | Satin foundation | Cream blush; satin highlighter high on cheeks only | Powder on T-zone and sides of nose |
| Oily | Mattifying primer on T-zone; skip glow primer | Long-wear satin or natural finish foundation | Gel or powder blush; finely milled satin powder highlighter | Powder T-zone; blotting papers during the day |
| Sensitive or breakout-prone | Simple, fragrance-free primer or none | Mineral tinted sunscreen | Simple cream blush; minimal highlighter | Fragrance-free mist |
If you’re prone to breakouts, the AAD recommends choosing makeup labeled oil-free, non-comedogenic or “won’t clog pores,” and removing all makeup before bed. If you have oily skin, our moisturizer for oily skin guide helps you get hydration without extra shine.
A tinted mineral sunscreen is a smart base for sensitive skin. The AAD notes that tinted sunscreens can also help protect against visible light, which can worsen dark spots, and that you still need to reapply sunscreen about every two hours when you’re outdoors.
Where to Put Highlighter on Textured Skin or Fine Lines
Highlighter reflects light, and light shows texture. So the rule is simple: highlight smooth, high areas; leave textured, low or lined areas alone.
| Area | Highlight? | Why |
|---|---|---|
| Top of the cheekbone (high and toward the temple) | Yes | Usually the smoothest skin; lifts the face |
| Outer brow bone, under the tail of the brow | Yes, a tiny amount | Gives the eye a lifted look |
| Center of the eyelid | Yes, satin only | Brings the eye forward |
| Inner corner of the eye | Yes, a dot | Brightens without touching crepey skin |
| Cupid’s bow | Yes, a dot | Makes the upper lip look fuller |
| Bridge of the nose | Only if smooth | Skip if you have visible pores there |
| Center of the forehead | Usually no | Oily area; can look shiny, not glowy |
| Under the eyes | No | Magnifies fine lines and crepiness |
| Apples of the cheeks / inner cheeks | No if textured | Pores and texture are most visible here |
| Smile lines and around the mouth | No | Highlights the lines you want to soften |
| Chin tip | Rarely | Often oily; can look shiny in photos |
Highlighter Tricks for Textured Skin
- Use cream or liquid, not powder. Creams melt in; powders sit on top of texture.
- Choose satin over shimmer. If you can see individual sparkles in the pan, it will show on texture.
- Apply with a fingertip, pressing. Warmth melts the product and pressing avoids dragging it into lines.
- Place it higher than you think. On the bone, closer to the temple, not on the fuller part of the cheek.
- Check in daylight. Turn your head side to side by a window. If you see a stripe, tap the edges with a clean sponge.
- Try “skin glow” instead of highlighter. A balm or face oil tapped on the cheekbones gives a wet look without any shimmer at all.
Firmer-looking skin reflects light better, too. Our guide to firmer looking skin covers skincare that supports a smoother surface.
Free: the Natural Makeup Cheat Sheet
Where to place blush and highlighter, a hooded-eye guide, a 5-minute everyday face and a makeup bag expiry chart, on 10 printable pages.
Free. You will also get a few short emails with tips and offers. Unsubscribe anytime. Privacy policy.
How to Keep Glowing Makeup Dewy, Not Greasy
The difference between glow and grease is location and control. Glow sits on the high points; grease spreads across the T-zone and sides of the nose.
- Use the right moisturizer for your skin type. Rich creams on oily skin create shine, not glow.
- Keep the base thin. Layers of radiant foundation build into greasiness.
- Powder the “shine zone.” The sides of the nose, between the brows, the chin and the center of the forehead.
- Don’t stack shimmer. If your primer and foundation are luminous, use a satin blush and skip highlighter, or vice versa.
- Blot, then mist. During the day, press a blotting paper on oily areas and mist lightly. Re-powdering again and again can look cakey.
- Re-apply sunscreen smartly. Cleveland Clinic suggests a mineral powder sunscreen for midday touch-ups over makeup, which also tames shine.
Take a photo with your phone flash in a dim room. Flash shows exactly where glow is turning into shine. Powder those spots lightly and you’re done.
3 Glowing Skin Makeup Looks for Every Day
The 5-Minute “No-Makeup” Glow
Moisturizer, tinted mineral sunscreen, concealer dots, cream blush on the cheekbones (also tapped on the lids), a fingertip of balm highlighter, curled lashes and a tinted lip balm. Ideal for errands and video calls.
The Everyday Dewy Look
Full prep, glow primer on cheekbones, skin tint, peach corrector and concealer, cream bronzer, cream blush, satin highlighter, matte crease shade, mascara, filled brows, lip liner and a sheer lipstick. Powder only the T-zone and mist.
The Evening Glow
Satin foundation, slightly more coverage, cream bronzer to sculpt, cream blush layered with a touch of powder blush to lock it, liquid highlighter on cheekbones and brow bone, a satin shimmer on the center lid, brown liner tightlined, a deeper rose or berry lip with gloss in the center. Set with powder in the center and a long-wear setting spray.
Related ReadHow to Refresh Dull Looking Skin NaturallyProducts for Glowing Skin Makeup
Luminous Skin Tint
A sheer, hydrating tint evens tone and lets real skin show through, which is the core of a dewy look. Choose one with a satin or radiant finish and no visible glitter.
Check on Amazon →Glow Primer
A light-reflecting primer worn alone or under a skin tint. Use it on the outer face and keep a smoothing primer for pores.
Check on Amazon →Cream Highlighter Stick
A satin cream stick glides on and melts into skin with a fingertip. Look for “satin” or “glow” rather than “glitter” or “metallic.”
Check on Amazon →Liquid or Cream Blush
A few dots blend out a long way. Rose, peach and soft berry suit most skin tones.
Check on Amazon →Hydrating Setting Spray
The final step that turns “made-up” into “skin.” Mist from arm’s length after powder.
Check on Amazon →Blotting Papers
Press, don’t rub, on the sides of the nose and forehead to keep a glow from turning greasy by afternoon.
Check on Amazon →Glowing Makeup Mistakes to Avoid
- Glitter highlighter. Visible sparkle emphasizes pores and lines.
- Highlighting under the eyes. It draws attention to crepey skin.
- Glow products everywhere. Luminous primer, radiant foundation, shimmer blush and highlighter together equals shine.
- No powder at all on oily skin. A little powder on the T-zone keeps glow intentional.
- Skipping prep. Dry flakes catch highlighter and look patchy.
- Layering too fast. Give sunscreen a few minutes before makeup.
- Heavy contour. Strong, cool contour can look harsh on dry or textured skin; soft warmth looks better.
- Relying on makeup SPF. Wear real sunscreen underneath and reapply when outdoors.
Glowing Skin Makeup Checklist
- Gentle exfoliation a day or two before, not the morning of
- Hydrating serum and moisturizer on damp skin
- Broad-spectrum SPF 30+, given a few minutes to set
- Glow primer on cheekbones, smoothing primer on pores
- Thin skin tint or satin foundation, pressed in
- Peach corrector and creamy concealer in dots
- Cream bronzer on the temples and under cheekbones
- Cream blush high on the cheekbones
- Satin highlighter on high, smooth points only
- No highlighter under the eyes or on texture
- Powder on the T-zone and sides of the nose
- Hydrating mist; blot rather than re-powder
The Natural Makeup Playbook
A profile quiz, foundation and concealer that don’t settle into lines, lift placement maps, eye maps for hooded and crepey lids, brows and lips, 5/10/20-minute routines, day-to-evening looks, a troubleshooting table and printable face charts. Instant access.
See the Playbook ($19) →Frequently Asked Questions
How do I get glowing skin makeup without looking greasy?
Prep with hydrating serum, moisturizer and sunscreen, then use a thin luminous base, cream blush and a satin highlighter only on the high points of your face. Keep the T-zone softly matte and finish with a hydrating mist.
Is dewy makeup good for dry or textured skin?
Yes, when it’s done with satin textures and careful placement. A dewy finish makes skin look more hydrated and rested than heavy matte makeup, as long as you avoid glitter and keep shine off oily areas.
Where should I put highlighter if I have wrinkles?
On the very top of the cheekbones toward the temple, a small amount under the tail of the brow, the center of the lid, the inner corner of the eye and the cupid’s bow. Avoid under the eyes, smile lines and textured cheeks.
How do I stop dewy makeup from looking greasy?
Use a moisturizer that suits your skin type, keep the base thin, don’t stack several glow products, powder the sides of the nose and center of the face, and blot instead of re-powdering.
Is cream or powder highlighter better for textured skin?
Cream or liquid highlighters usually look better on dry or textured skin because they melt into the skin. Very finely milled satin powders can work on oily skin.
What foundation gives a glowing finish?
Skin tints, serum foundations and foundations labeled “radiant,” “luminous” or “satin” give a natural glow. Oily skin may prefer a satin foundation with a glow product only on the cheekbones.
Can I get glowing makeup with oily skin?
Yes. Use a mattifying primer on the T-zone, a satin foundation, powder on oily areas and a fine satin highlighter only on the top of the cheekbones.
Sources: American Academy of Dermatology, Sunscreen FAQs; American Academy of Dermatology, Can makeup cause acne?; American Academy of Dermatology, How to safely exfoliate at home; American Academy of Dermatology, Dermatologists’ top tips for relieving dry skin; Cleveland Clinic, Is the sunscreen in your makeup enough?; National Institute on Aging, Skin care and aging. Application tips reflect common makeup artist recommendations; Veranoz has not tested every product listed. This guide is general information, not medical advice.
Get the Free Self-Care Reset Kit
Daily, weekly and monthly self-care checklists, the everything shower order, a 3-hour at-home spa day plan and a 30-day reset tracker. Free printable, instant access.
The Veranoz 30-Day Glow-Up Planner
Routines only work when you actually keep them. The planner gives you daily planning pages, weekly resets and habit trackers so your skincare, body care and self-care steps become automatic instead of something you remember once in a while.
Veranoz Guides to Go Deeper
Some links on Veranoz are affiliate links; we may earn a commission at no extra cost to you. This content is informational and not medical advice.